Skip to content
I see many drivers worry about brake work. I also see some techs rush it. Both lead to risk. The wrong steps damage calipers. The right steps are safe and clear. I break the process down. I keep it simple. I use parts I trust from Runex Auto.
You remove brake pads by lifting the car, removing the wheel, unbolting the caliper, sliding out the old pads, compressing the piston, and installing new pads with clean hardware. You replace pads in pairs. You check even wear and rotor condition. You torque bolts to spec and bed the pads.
I want you to feel calm and sure when you start. I also want your team to avoid returns. I will show you a clear process. I will give you real checks. I will point to the common traps. I will also show how Runex Auto pads solve noise, dust, and wear issues. I will keep each step short and clear.
Should I be able to remove brake pads by hand?
Brakes look simple. Brakes also fail if you pull hard and skip checks. If a pad slides out by hand, the guide pins and clips are clean. If it sticks, there is dirt or rust. I do not force it. I clean and lube. I let the pad slide free. That keeps the caliper square.
Yes, you can often slide pads out by hand after you remove the caliper and clips. If pads stick, you stop and clean the bracket, pins, and abutment areas. You never pry on the friction surface. You use fresh clips. You use silicone brake grease. Runex Auto pad plates fit true and help a smooth removal.
Dive deeper
I check if the pad comes out by hand after I remove the caliper. I do not fight the pad. If it binds, it tells me that the bracket has rust high spots. The fix is simple. I clean the abutment area with a small file or brush. I remove only the rust bloom. I do not remove base metal. I install new stainless clips. I apply a thin layer of silicone brake grease1. I keep grease away from friction surfaces. I keep grease away from rubber.
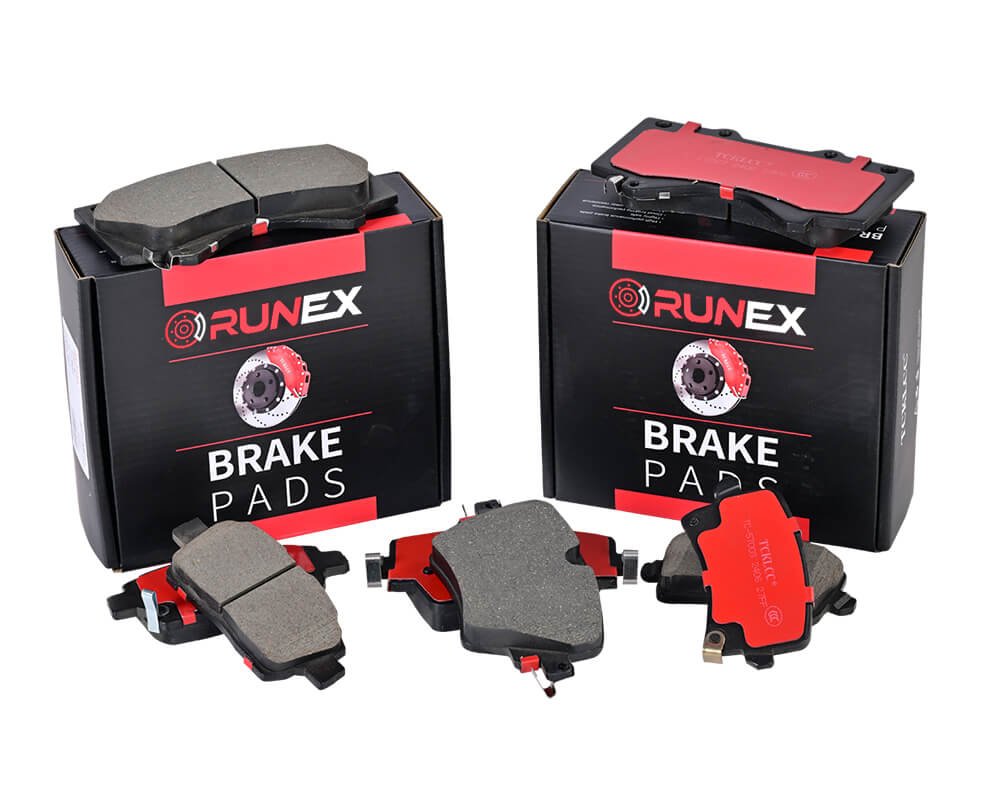
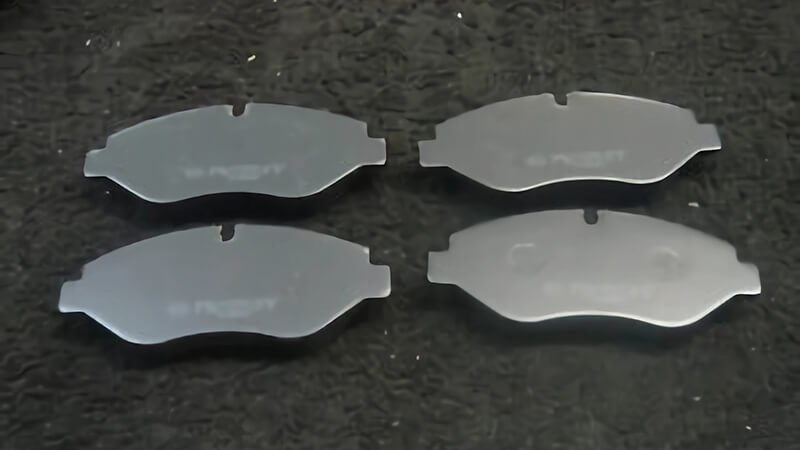
Runex Auto pad backing plates have tight tolerances. The ear thickness stays consistent. The powder coat is even. The anti-corrosion finish resists flaking. So the pad ear does not swell. This helps easy removal and later service. The multi-layer shims stay bonded. They do not peel when warm. So I do not fight a loose shim during removal.
I also look at the guide pins2. If the pins are dry or torn, the pad will stick. I clean the pins. I use silicone or glycol-based brake grease that is safe for rubber. I replace the boots if they split. Runex Auto3 includes hardware kits on many references. The clips match OE geometry. The spring force is right, so the pads center well in the bracket.
I also watch for seized pistons. If the inner pad wears more, the piston may stick. I check piston movement4 with a clamp or a compressor tool. If the piston does not go back smooth, I stop and rebuild or replace the caliper. I do not force it. I keep safety first.
Common fit and removal checks
| Check item | Good sign | Action if bad |
|---|---|---|
| Pad ear fit in clip | Slides with light hand force | Clean abutment, replace clips |
| Guide pins | Smooth travel, no rust | Clean, lube, replace boots |
| Piston retract | Steady, even movement | Stop, rebuild/replace caliper |
| Backing plate coating | Even, intact | Replace pad if coating swells |
| Shim bond | Firm, no peel | Replace shim or pad |
I use a simple rule. If my hand says stop, I stop. I clean. I fit it right. This keeps noise low. This keeps wear even. This keeps returns down.

Is it easy to change brake pads on a car?
Many people say pad changes are easy. I agree only if you follow a checklist. The steps are simple. The risks are real. The wrong torque or a twisted hose costs you. I use a fixed routine. I follow torque specs. I bed the pads. I test drive.
The job is easy if you use a lift or jack stands, the right tools, and a clean workflow. You remove the wheel, unbolt and hang the caliper, swap pads and clips, compress the piston, torque the bolts, pump the pedal, and bed the pads. Runex Auto pads fit like OE and include shims and wear sensors on many lines.
Dive deeper
I start with a safe setup. I park on level ground. I chock the wheels. I loosen lugs before I lift. I use jack stands. I keep hands clear of pinch points. I hang the caliper with a hook. I never let it hang by the hose.
I keep my tools simple. I use a torque wrench5, a breaker bar, a caliper piston tool, a wire brush, a small file, silicone brake grease, brake cleaner6, and a pad spreader. I also keep new hardware close. Runex Auto pad kits7 often include stainless clips and multi-layer shims. This saves time. This also improves NVH.
I follow a standard step list. This cuts mistakes and makes training easy for new techs. Here is the core flow I use in the shop.
Pad change checklist
| Step | Action | Notes |
|---|---|---|
| 1 | Loosen lugs on the ground | Turn off traction control if needed |
| 2 | Lift car and set stands | Check weight rating |
| 3 | Remove wheel | Inspect tire wear while off |
| 4 | Inspect rotor and hose | Look for scoring, cracks, leaks |
| 5 | Remove caliper bolts | Use proper socket size, avoid stripping |
| 6 | Hang caliper | Do not stress hose |
| 7 | Remove old pads and clips | Keep track of wear sensor side |
| 8 | Clean bracket and pins | Brush rust, lube pins with safe grease |
| 9 | Compress piston | Open reservoir cap if needed, watch fluid level |
| 10 | Install new clips and pads | Runex Auto pads go with shim toward piston |
| 11 | Reinstall caliper and torque | Follow OE torque specs |
| 12 | Pump pedal to seat pads | Pedal goes firm before moving |
| 13 | Refit wheel and torque lugs | Cross pattern, proper spec |
| 14 | Bed pads | Follow Runex Auto bedding guide8 |
Runex Auto pads use stable friction material. We offer ceramic, semi-metallic, and NAO formulas. The friction curve stays flat across heat ranges. This gives smooth pedal feel during bedding. Our scorched surfaces reduce initial fade. Our chamfers and slots cut noise. Our copper-free mix meets 2025 regulations. Our positive mold process keeps density even. This means even wear and consistent bite.
I also run a short test drive. I check for pull. I do four or five medium stops from 30 mph to 10 mph. I keep space. I let the brakes cool between stops. I avoid hard stops for the first 300 km. This helps transfer a thin, even film on the rotor. This stops judder before it starts.
What are common mistakes when changing pads?
I often see the same few mistakes. People skip cleaning. People reuse old clips. People push dirty fluid back into the ABS. People forget to torque bolts. People skip bedding. Each one can cause noise, fade, or uneven wear. I want you to avoid these traps.
Common mistakes include not cleaning the bracket and pins, reusing worn clips, not compressing the piston fully, twisting brake hoses, pushing dirty fluid into the master cylinder, skipping torque specs, and ignoring bedding. Runex Auto pads reduce noise and dust, but they still need correct install and clean hardware.
Dive deeper
I like to call out the top seven mistakes. I also give a fix. This makes training faster. It also helps a team cut returns and claims. I saw this in a UK distributor case. The team saw many returns for uneven wear and squeal. We switched them to Runex Auto pads9 with matched hardware. We trained their techs on these seven points. Complaints dropped a lot. Warranty claims fell. Their customers felt more trust. Their repeat orders grew.
Here is my list with fixes.
Mistakes and fixes
| Mistake | Effect | Quick fix |
|---|---|---|
| Skipping bracket cleaning10 | Pads bind and wear uneven | Brush abutments, file rust high spots, install new clips |
| Reusing old clips | Noise and binding | Use new stainless clips from kit |
| Not lubing pins | Drag and heat | Clean pins and boots, lube with rubber-safe grease |
| Forcing piston | Seal damage, pull to one side | Use a piston tool, open reservoir, go slow |
| Twisting hose | Hose failure risk | Hang caliper, watch hose twist, reposition as needed |
| Ignoring torque | Loose bolts or warped rotor from wrong lug torque | Use a torque wrench11 on caliper bolts and lugs |
| Skipping bedding | Noise and judder | Follow bedding process and cooldown |
Runex Auto pads help reduce many of these risks. The backing plates use powder coat that resists flake and swell. The shims are multi-layer, pressure bonded. The edges have proper chamfer angles. The slots break gas and help alignment. The friction mix is dyno tested for fade and recovery. We match formulas to axle weight and rotor mass. We test to ECE R90 where required. We also offer wear sensors that clip tight and do not rattle.
I also remind teams about fluid care12. If the reservoir is full, compressing the piston can spill fluid. Brake fluid eats paint. I remove some fluid before I compress. I also avoid pushing very dirty fluid back into the ABS unit. I use a bleeder if the fluid is old. Clean fluid protects the system.
I teach a calm pace. I keep parts laid out in order. I keep a clean bench. I stop when something feels wrong. This mindset saves time. It also saves cost.
What are signs of worn brake pads?
I do not guess. I look. I listen. I measure. Worn pads give clear signs. You hear squeal from the wear indicator. You feel longer stopping. You see dust increase. You feel vibration. You see low pad thickness. You see rust lips on the rotor edge. Each sign tells a story.
Signs include a squeal or chirp at low speed, longer stopping distances, a soft or long pedal, vibration under braking, visible pad thickness under 3 mm, and uneven wear inside vs outside. You also see warning lights on vehicles with wear sensors. Runex Auto pads include wear indicators on many references.
Dive deeper
I use a simple triage method. I check sound, feel, and sight. Then I confirm with a measurement. This makes the call clear to the driver and the procurement manager. It also keeps records clean for warranty control.
Sound tells me first. A high chirp at low speed often comes from a wear indicator. Many Runex Auto pads13 include mechanical wear tabs. They hit the rotor at a set thickness. This gives a clear sound before metal-to-metal. Some cars use electronic wear sensors. We include sensor leads that match OE fit. The connector locks firm. The wire length is right. This prevents chafing and false lights.
Feel comes next. A longer stop can mean pad fade14 or glazed surfaces. It can also mean old fluid. If the pedal feels long but pumps firm, I check for pad knock-back or caliper drag. If the pedal feels soft all the time, I check for air or leaks. Vibration under brake can be DTV or uneven pad transfer. Proper bedding with Runex Auto pads helps prevent this. Our formulas lay a stable transfer film.
Sight is final. I inspect pad thickness through the caliper window if I can. If not, I remove the wheel. I check both inner and outer pads. The inner often wears faster. If the inner is thin and the outer is fine, I look at the slide pins and piston. I also check rotor surface for grooves and heat marks. A blue tint shows heat. A ridge at the edge shows rotor wear. I check the pad surface for cracks, glazing, or contamination.
Then I measure. I use a pad gauge or calipers. I note thickness on the work order. I replace pads at about 3 mm. I also check rotor minimum thickness. I replace or machine if below spec or if the surface is bad. I replace pads in pairs on an axle. I do not mix old and new on one side.
Wear signs and actions
| Sign | Likely cause | Action |
|---|---|---|
| Chirp at low speed | Wear indicator contact | Inspect pads, replace if at or below 3 mm |
| Vibration on brake | DTV or uneven transfer15 | Resurface or replace rotors, bed new pads |
| Pull to one side | Seized slide or piston | Service pins, rebuild or replace caliper |
| Excess dust | Low-quality friction | Use Runex Auto low-dust formula |
| Cracks or glazing | Overheat or hard use | Replace pads, check driving profile, bed properly |
| Warning light | Electronic sensor tripped | Replace pads and sensor, reset light |
Runex Auto pads use consistent friction. The wear rate is stable. The dust is low and fine, so it cleans easy. The shims keep noise low. The formula resists fade. This keeps customers safe and calm. It also reduces returns and warranty issues.

Conclusion
Brake pad 16 service looks simple. It can be safe and clean if we follow a clear path. I remove the wheel. I remove the caliper. I slide out the pads. I clean and lube. I compress the piston. I fit new Runex Auto pads and hardware. I torque and bed. I test drive. I watch for the common traps. I teach my team the same steps. This approach keeps stop power strong. It keeps customers loyal. It keeps costs low.
-
Explore this link to understand the benefits of silicone brake grease in maintaining brake systems and preventing wear. ↩
-
Learn the best practices for maintaining brake guide pins to ensure smooth operation and prevent sticking. ↩
-
Discover the unique features of Runex Auto brake pads that enhance performance and longevity in your vehicle. ↩
-
Find out the common causes of brake piston movement issues and how to address them effectively. ↩
-
Learn the correct usage of a torque wrench to ensure safe and effective brake installations, preventing potential issues. ↩
-
Discover the top-rated brake cleaners that effectively remove contaminants and ensure optimal brake performance. ↩
-
Explore the advantages of Runex Auto pad kits, including improved performance and reduced noise, to enhance your brake system. ↩
-
Understand the bedding process for brake pads to enhance performance and longevity, ensuring a smooth driving experience. ↩
-
Explore how Runex Auto pads can enhance brake performance and reduce issues like noise and uneven wear. ↩
-
Learn why proper bracket cleaning is crucial for preventing uneven wear and ensuring optimal brake function. ↩
-
Discover the importance of using a torque wrench to avoid loose bolts and warped rotors during brake installation. ↩
-
Understand the best practices for brake fluid care to protect your braking system and prevent damage. ↩
-
Explore the advantages of Runex Auto pads, including their low dust and consistent friction, ensuring safety and performance. ↩
-
Understanding pad fade is crucial for maintaining brake performance; learn about its causes and prevention methods. ↩
-
Discover effective solutions for DTV and uneven transfer issues to enhance your vehicle's braking efficiency. ↩
-
Find the best auto brake pads from Runex Auto. ↩