Changing a car battery may sound complicated, but it doesn't have to be. With the right steps and some basic tools, you can replace your car battery easily and save money.
Replacing a car battery is a straightforward process. By following a few simple steps, you can ensure your vehicle runs smoothly without the hassle of costly mechanic visits. Here's a quick guide on how to do it safely and efficiently.
Now, let’s break down the process step by step so you can follow along. Whether you're a seasoned DIYer or a beginner, this guide will help you through each stage of replacing your car battery.

How to replace a car battery step by step?
Replacing a car battery may seem daunting, but it is one of the most basic car maintenance tasks you can perform. In this section, we'll walk through each step, making the process as easy as possible.
To replace a car battery, you'll need a few simple tools. Follow these steps: gather your tools, disconnect the old battery, remove it, install the new one, and finally, reconnect the terminals. It's that simple!
Replacing a car battery involves five essential steps that can be completed with minimal experience. First, you'll need to gather your tools, which include a wrench, a new battery, gloves, and safety glasses. Make sure you're in a well-ventilated area, and that your car is turned off before you start. It's important to wear gloves and glasses for safety, as car batteries contain acid that can be harmful.
Step 1: Turn off the engine and locate the battery
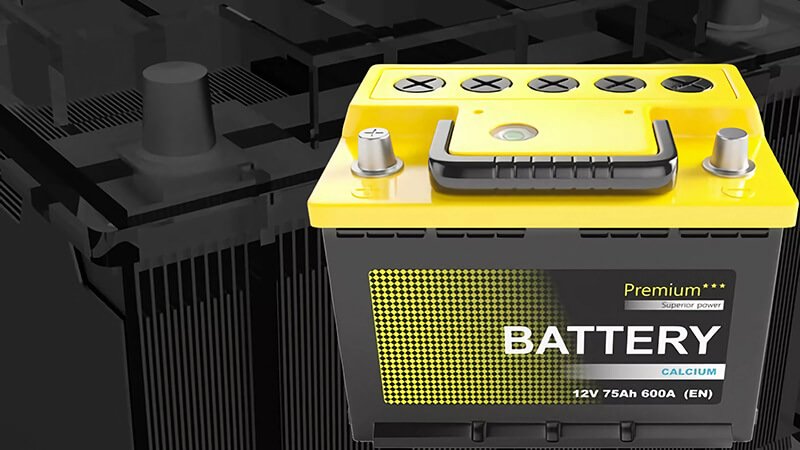
Before doing anything, ensure that the engine is off and the car keys are removed. Open the hood and locate the battery. Typically, the battery is located near the engine and will be easily identifiable due to its rectangular shape.
- Pro Tip: If you're unsure of the battery’s location, refer to your vehicle’s owner manual1. Some batteries may be located in the trunk or beneath the rear seat for specific vehicle models.
Step 2: Disconnect the negative terminal
Always start with the negative terminal. This is usually marked with a minus sign (-) and is typically black. Use your wrench to loosen the nut on the negative terminal and disconnect the cable. This step ensures that no electrical current will flow when you're working on the battery.
- Why Disconnect the Negative Terminal First? Disconnecting the negative terminal first prevents the risk of an electrical short. This is crucial as the metal tools may come in contact with the car body, completing a circuit and causing sparks. Learn more about why disconnecting the negative terminal is important2.
Step 3: Disconnect the positive terminal
Next, disconnect the positive terminal, which is typically red and marked with a plus sign (+). Again, use your wrench to loosen the nut and remove the cable.
- Key Safety Tip: Always handle the positive terminal with care, and ensure the wrench doesn't touch any metal parts of the car once you’ve disconnected it. This will avoid any risk of shorting out the battery. For more on safety when handling the positive terminal3, check out this guide.
Step 4: Remove the old battery
Once both terminals are disconnected, remove any brackets or straps securing the battery in place. Carefully lift the battery out of its compartment. Batteries can be heavy, so use proper lifting techniques.
- Remember: Always lift with your legs and not your back to prevent injury. Also, some vehicles may have an additional plastic cover protecting the battery, so make sure to remove that first. Proper lifting techniques4 can help avoid injury when handling heavy batteries.
Step 5: Install the new battery
Place the new battery into the compartment, ensuring it is oriented the same way as the old one. Reattach the securing straps or brackets to hold it in place. Then, reconnect the positive terminal first, followed by the negative terminal. Tighten both connections securely.
- Final Check: Double-check that both terminals are securely attached, and that the battery is stable in its compartment. A loose battery could lead to electrical issues in the future. Learn how to properly install a car battery5 and check the connections.
Finally, close the hood and start the engine to ensure everything is working properly.
| Step | Description | Tips |
|---|---|---|
| Step 1: Turn off the engine | Ensure the engine is off and the keys are removed | Follow proper safety procedures to avoid electrical shock |
| Step 2: Disconnect negative terminal | Disconnect the negative terminal first (black, -) | Reduces the risk of short-circuiting the battery |
| Step 3: Disconnect positive terminal | Disconnect the positive terminal (red, +) | Be cautious when working with the positive terminal |
| Step 4: Remove old battery | Remove any securing brackets and carefully lift the battery | Always use correct lifting posture to avoid injury |
| Step 5: Install new battery | Place the new battery, secure it, and reconnect terminals | Ensure all connections are tight to prevent future issues |

When replacing a battery, which terminal do you put on first?
This is a common question when replacing a car battery. It's crucial to know the correct order to avoid any electrical issues. So, which terminal should you connect first, positive or negative?
When replacing a car battery, always connect the positive terminal6 first, followed by the negative terminal7. This order minimizes the risk of a short circuit and ensures a safe connection.
When installing a new battery, the correct order of connecting the terminals is crucial to avoid damaging your vehicle's electrical system. The proper method is to always connect the positive terminal first, followed by the negative terminal.
By connecting the positive terminal first, you reduce the risk of short-circuiting the battery. If the negative terminal were connected first, any contact with a metal tool or part of the car while working on the positive terminal could result in a spark, potentially causing damage to the electrical system or even an explosion in extreme cases.
Why Start with Positive?
Connecting the positive terminal first prevents any accidental grounding while you're working. If you were to connect the negative terminal first, the circuit would complete when you make contact with the positive terminal, potentially causing sparks or a short circuit. Learn more about the correct sequence for connecting battery terminals8.
Safety Considerations
- Always ensure that your wrench or tool doesn’t touch any metal parts of the car while you're working. This could cause a dangerous spark.
- Make sure that the battery is installed correctly, ensuring there’s no risk of battery leakage or damage. Learn more about car battery safety9.
Once both terminals are connected, ensure that the connections are tight and secure to avoid any future issues. An improper connection can lead to battery failure or power problems with your vehicle's electrical components.
| Terminal Connection Order | Recommended Action | Reason |
|---|---|---|
| First: Positive (+) | Connect the positive terminal first | Avoids grounding and short circuit risks |
| Second: Negative (-) | Connect the negative terminal last | Minimizes risk of sparks and damage during installation |

What are the procedures when removing and replacing a car battery?
Knowing the exact steps to remove and replace a car battery properly is essential for avoiding mistakes and potential issues. Here's a deeper look at the correct procedure for both removing and replacing a battery.
When removing a car battery, the main procedure involves disconnecting the terminals in the correct order, removing any securing brackets, and lifting the battery out. For installation, the process is similar—ensure everything is tightly secured, and connections are correctly made.
Removing and replacing a car battery is a simple process, but it does require attention to detail to avoid electrical damage or injury. When removing the old battery, begin by disconnecting the negative terminal first, followed by the positive terminal. This order ensures that there's no risk of creating a short circuit.
Proper Removal Procedures:
- Step 1: Disconnect both terminals (negative first, positive second) to eliminate electrical flow.
- Step 2: Loosen and remove any brackets, clips, or clamps that hold the battery in place.
- Step 3: Carefully lift the battery out of its compartment. Be cautious as some batteries can be quite heavy.
- Step 4: Dispose of the old battery responsibly, as it contains hazardous chemicals.
Proper Installation Procedures:
- Step 1: Install the new battery with the correct orientation (positive and negative terminals in the correct position).
- Step 2: Secure the battery with the necessary brackets and clamps.
- Step 3: Connect the positive terminal first, followed by the negative terminal.
- Step 4: Tighten the connections and ensure everything is stable and secure.
| Task | Description | Safety Tips |
|---|---|---|
| Disconnecting | Disconnect the negative terminal first, followed by positive | Prevent short-circuiting by following the correct order |
| Removing the Battery | Loosen any battery restraints and carefully lift out | Use proper lifting techniques to avoid injury |
| Installing the New Battery | Place the new battery and secure it with brackets | Ensure tight terminal connections and proper battery orientation |
| Final Check | Double-check all connections and battery position | Make sure the battery is stable and properly connected |

Can a beginner change a car battery?
Replacing a car battery doesn’t require advanced mechanical skills. But, can a beginner tackle this task without professional help? Let’s explore whether it’s something a beginner can handle on their own.
Yes, a beginner can replace a car battery with minimal experience. The process is simple, requiring just a few basic tools and following the correct steps. However, if you're unsure, seeking guidance from a professional is always a good idea.
Many people hesitate to replace their car battery themselves, thinking it's a job reserved for professionals. The truth is, replacing a car battery is a straightforward task that can be handled by most beginners. The key is to follow the steps carefully and take your time to ensure everything is done correctly.
Why a Beginner Can Do It:
- Minimal Tools Required: With just a few basic tools (wrench, gloves, safety glasses), almost anyone can tackle this job.
- Simple Steps: The process of removing the old battery and installing the new one follows a clear, logical order.
- Low Risk: The risks are minimal as long as you follow safety precautions, such as wearing gloves and ensuring no tools come into contact with the car’s metal body.
For beginners, it’s often helpful to watch tutorial videos or read a step-by-step guide like this one to get familiar with the process. Even though it’s an easy task, if you ever feel uncomfortable or uncertain, consulting a professional is always a good option.
| Task for Beginner | Description | Advice for Beginners |
|---|---|---|
| Safety Measures | Always wear gloves and glasses for protection | Be cautious around battery acid and electrical components |
| Tools to Gather | Wrench, gloves, safety glasses, new battery | Keep tools organized and nearby |
| Procedure | Follow the steps one by one, carefully | Watch a tutorial for extra guidance |
| Troubleshooting | Ensure proper connections and secure battery placement | If unsure, seek advice from a professional mechanic |
Conclusion
In conclusion, replacing a car battery is a simple and manageable task that almost anyone can do. By following the correct steps, using the proper tools, and adhering to safety precautions, you can replace your car battery in no time. Whether you're a beginner or have some experience, this guide will ensure the job is done right.
-
Provides detailed instructions for vehicle-specific battery locations and maintenance tips. ↩
-
Explains the importance of preventing electrical shorts and safety precautions when handling car batteries. ↩
-
Offers tips for safely handling the positive terminal and avoiding short circuits. ↩
-
Provides safety tips for lifting heavy objects to avoid back injuries. ↩
-
Offers a step-by-step guide to ensure proper battery installation and secure connections. ↩
-
Explains what the positive terminal is and why it's important to connect it first. ↩
-
Describes the role of the negative terminal and the proper method for disconnecting it. ↩
-
Provides the step-by-step procedure to ensure safe and proper battery installation. ↩
-
Offers insights into proper battery installation techniques and safety measures to avoid leaks. ↩


